I guess I’m not leaning too far out of the window when I claim that no “one to rule them all” blockchain will prevail in the future (sorry… Ethereum!). This means that we will (also in the future) interact with a large number of different blockchains that complement and/or compete with each other. One of the core challenges will be to connect this variety of blockchains in such a way that users can use Web 3 services such as decentralized finance across chains in the simplest possible way. The Cosmos ecosystem offers a solution for this multi-chain world. In this blog post I will show you step by step how to succeed in your first steps in the Cosmos chains.
(By the way, if you want to learn more about the general evolution of blockchain technology from Bitcoin in 2008 to today’s multi-chains like Cosmos, then I recommend you this post.)
What is Cosmos?
Cosmos is a decentralized network of independent blockchains running in parallel. However, “independent” does not mean that the blockchains cannot communicate with each other; rather the contrary! Because that is exactly the ideo behind the Cosmos project: Before projects like Cosmos, blockchains were isolated systems in silos that could not communicate with each other. Not only was it hardly possible to exchange data between the blockchains, but it was also a time (and money) intensive effort to create an individual chain tailored to one’s own needs. So the problem in a nutshell: It was i) too complicated to build your individual chain and ii) once you actually did it, your chain could (almost) not interact with other chains.
Cosmos has solved this problem with its “Internet of Blockchains” approach (or Blockchain 3.0, as such approaches are often called) as follows:
- First, Cosmos created a cross-chain network that connects blockchains. To do this, Cosmos introduced the Inter-Blockchain Communication protocol (IBC).
- Secondly, Cosmos developed a plug-and-play toolkit (SDK = Software Development Kit), which enables developers to launch their own very individual blockchains through simple parameterization etc. The best-known blockchain developed with the Cosmos SDK is probably the Binance Chain (BNB).
So, now you roughly know the basic idea behind Cosmos. But enough of the theory. We don’t want to cram into theories here, we want to experience the protocols directly for ourselves. So next, I’ll show you step by step how to get started in the Cosmos world. We look at the use case where we want to buy an NFT on the Cosmos-based NFT marketplace Stargaze. Roughly, the following five steps are necessary for this:
- Get Keplr wallet for access to Cosmos chains
- Load Keplr wallet with ATOM tokens
- Convert ATOM tokens into STARS tokens via Osmosis
- Transfer STARS tokens to the Stargaze chain
- Buy your NFT with STARS tokens on the Stargaze chain
Step 1: Get the Keplr wallet to access Cosmos
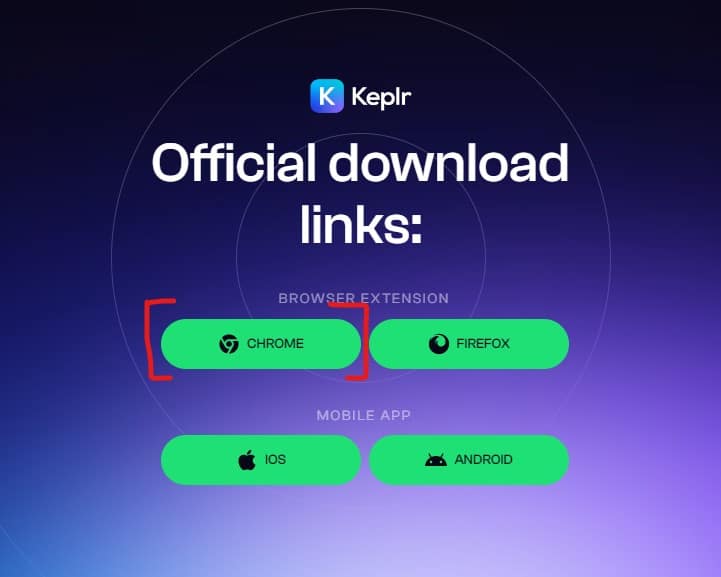
As you know, without a suitable wallet nothing works in Web3. And since Cosmos is not EVM (=Ethereum Virtual Machine) compatible, we cannot use our beloved MetaMask here. But don’t worry, there’s a nice wallet for cosmonauts too: the Keplr wallet. With this wallet you can access all Cosmos chains. Like MetaMask, Keplr is also available as a browser extension and as a mobile app. Here you will find the link to the download page. In our example we choose the Keplr browser extension for Chrome.
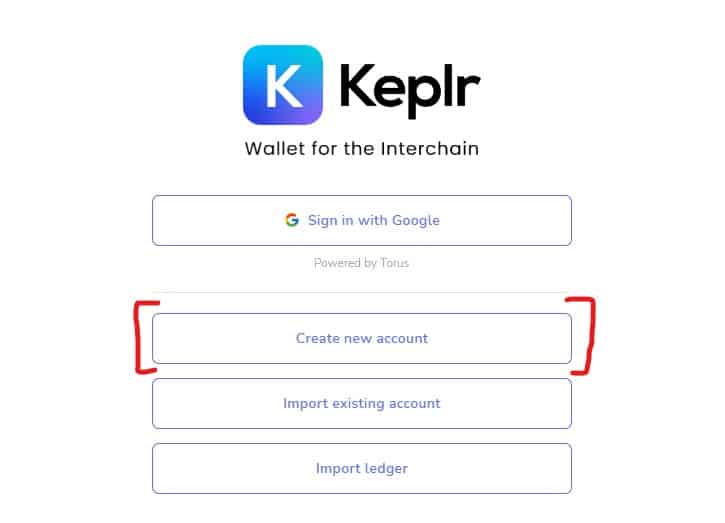
After installing the Chrome extension, we click Create new account, if we don’t already have an existing account.
And now come the usual steps, which we use in one form or another whenever we set up a new wallet. A key step is always writing down the seed phrase (or what Keplr calls the mnemonic seed). This is the 12 or 24 word combination that you (and anyone else) can use to reconstruct your wallet and thus have unrestricted access to all your tokens. And as always: You absolutely have to keep this seed phrase / mnemonic seed safe and NEVER SHARE IT WITH ANYONE! (Below in the screenshot you can see the 12 words mnemonic seed shown as an example just to illustrate the process. I will never use this mnemonic seed myself for my wallet… and neither should you!)
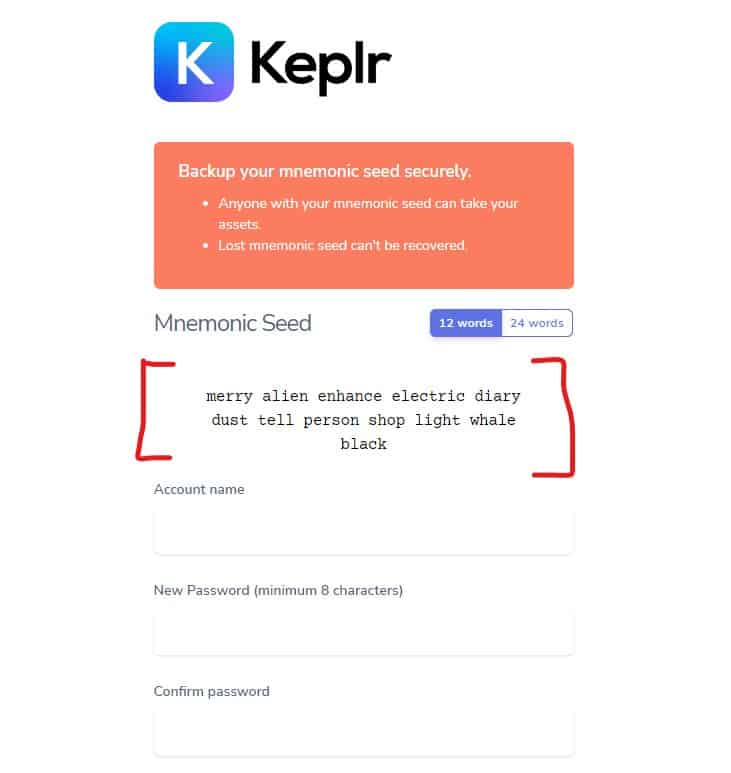
Next you set your Account name and your Password and your Keplr wallt is ready to use… but unfortunately still empty.
Step 2: Load Cosmos ATOM token into your Keplr wallet
At this point, a small insertion on the subject of transaction fees and native currencies: To execute a blockchain transaction, you have to pay a transaction fee in the native currency of the respective chain. For example, you pay Ethereum transaction fees in ETH and Polygon transaction fees in MATIC. Exactly the same is the case with Cosmos blockchains: You have to pay transaction fees in the native currency of the respective chain. But in the Cosmos world this is a little bit more complicated because each individual Cosmos chain has its own native currency. So which tokens should you get yourself for our use case so that you can finally buy your NFT on Stargaze? There are different ways to reach your goal. But it is probably easiest if you first get ATOM tokens in your wallet. ATOM is the native currency of the Cosmos Hub chain, which is like a hub at the center of the Cosmos network. Once you have ATOM tokens in your wallet, you can easily exchange them for other tokens and move them to other Cosmos chains to then buy your NFT or use other DeFi services.
But how do you get ATOM tokens? Since I am mostly on Polygon myself, I would like to “bridge” MATIC tokens from Polygon to the Cosmos Hub chain. Unfortunately, there is currently no simple bridge between the two blockchains. So I choose the inelegant and slow route of the fiat onramp; i.e., I buy a few ATOM tokens from a central provider by paying with fiat currency. In our case we do this via MoonPay. In the MoonPay user interface we enter the address of our Keplr wallet in addition to the credit card details … et voilà… four minutes later the purchase order at MoonPay is through:
As a result, we now see 1.56 ATOM in our wallet:
Step 3: Exchange your ATOM tokens into STARS tokens via Osmosis
You now have ATOM tokens from the Cosmos Hub chain in your wallet, but actually you need STARS tokens on the Stargaze chain to buy an NFT on the Stargaze marketplace. Therefore, we now need to swap and move tokens across chains.
The best way to exchange ATOM tokens for STARS tokens is to use the Osmosis DEX (DEX = Decentralized EXchange) on the Osmosis chain. This is the most widely used DEX in the Cosmos ecosystem. First, we have to transfer our ATOM tokens from the Cosmos Hub chain to the Osmosis chain to then do the swap there. We achieve this sending of the ATOM tokens to Osmosis via the Asset deposit screen shown below. Let’s send over 1 ATOM:
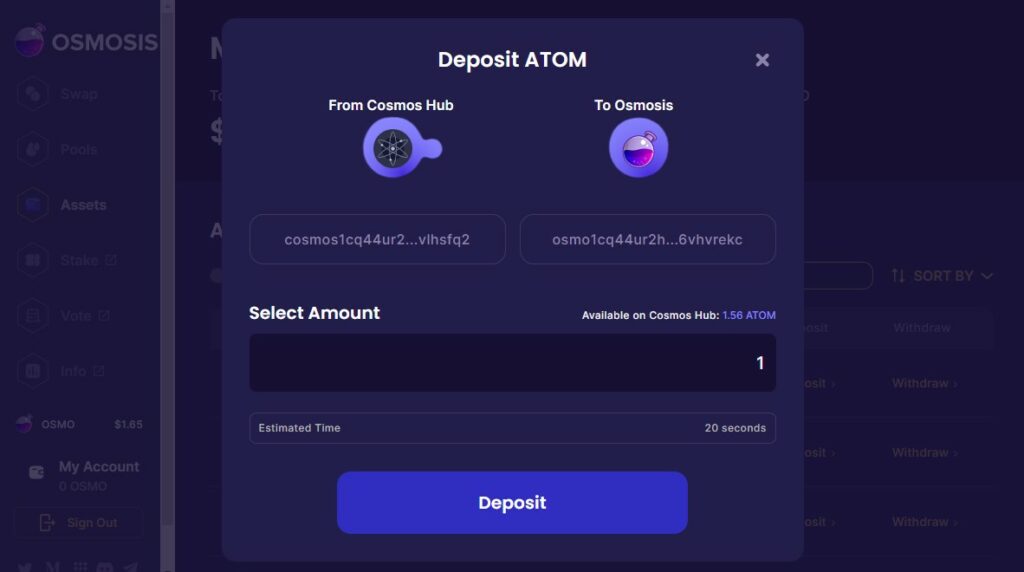
As expected, we have to confirm the transfer with our Keplr wallet. In the wallet we see that the token transfer from one chain to the other goes via the IBC (Inter-Blockchain Communication Protocol), which connects the individual Cosmos chains. The transaction fee of $0.05 is OK for us and we click Approve.
Now we have our ATOM token on the Osmosis chain and we can use the Osmosis DEX to swap the ATOM token to STARS tokens:
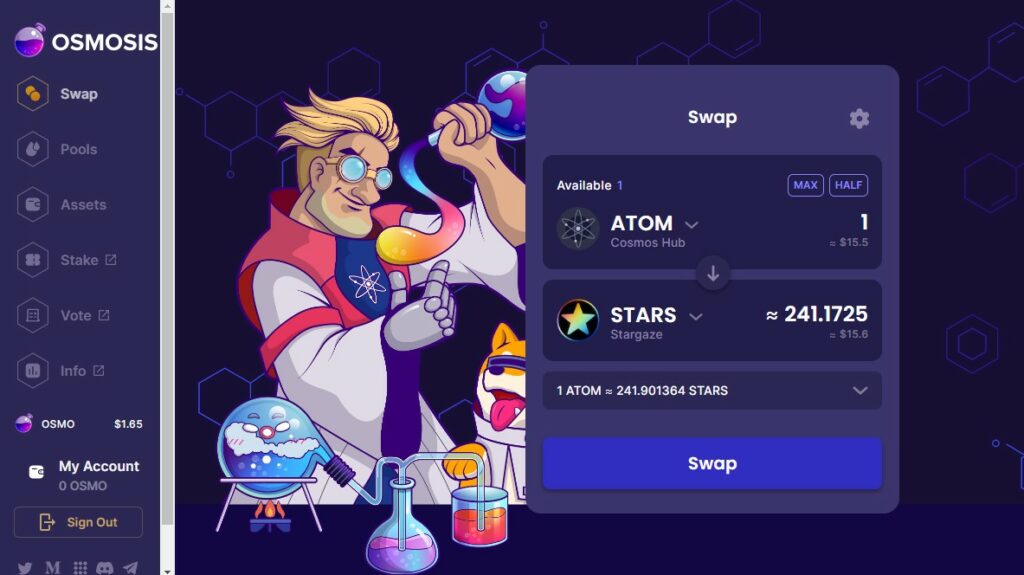
We confirm the transaction in our wallet… and are happy that we don’t have to pay any fees for it.
Step 4: Bring the STARS tokens onto the Stargaze chain
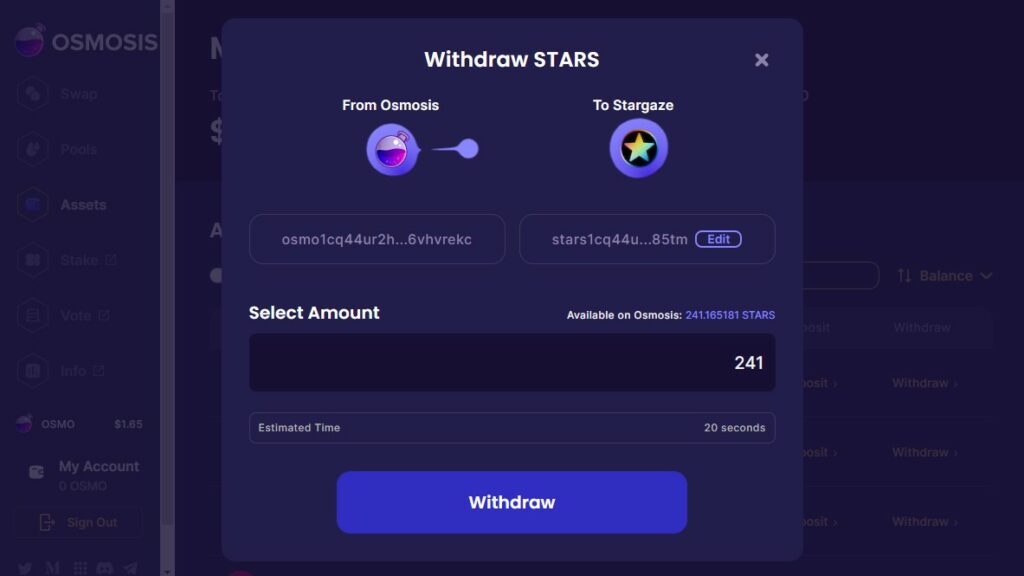
We are now the proud owners of 241 STARS tokens. However, these are still on the osmosis chain. But we need the tokens on the Stargaze chain to buy our NFT there. Nothing simpler than that: We go to the Osmosis Asset Withdraw screen and click Withdraw to transfer 241 STARS tokens from the Osmosis chain to the Stargaze chain:
Step 5: Buy your NFT on the Stargaze chain
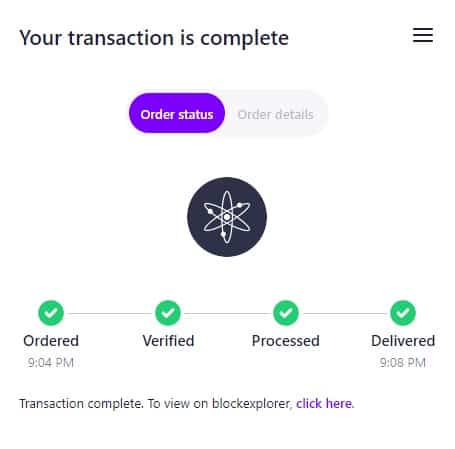
Since we now have our 241 STARS on the Stargaze chain we can now open the NFT marketplace Stargaze via stargaze.zone, where we buy a beautifully colored bird NFT with a punk hairstyle including two butterflies from the Shadys Birds collection, for example.

With that we have come to the end of this journey across the Cosmos ecosystem. As you have seen, moving your tokens from one chain to the next to use a particular service takes a little bit of an effort. From monoliths like Ethereum we are used to do everything on the same chain. But there is good reasons why the Cosmos project is one of the most active and promising blockchain ecosystems as of now. I’m sure we’ll be hearing a lot more from Cosmos… and thanks to this post you’re well prepared.