
In the traditional financial world, it was reserved for the large asset managers to create funds and make them accessible to the general public, for example in the form of ETFs. The rules of the game have changed completely in the DeFi world: Everyone can set up their own fund (e.g., to manage a crypto basket for a small group of friends & family) and invest in funds directly without a broker.
Did I make you curious? Let’s take a closer look: Like everything in the DeFi space, decentralized fund management works via smart contracts (often called decentralized protocols) on a blockchain such as Ethereum. The rules on how a fund is structured, issued, traded, managed, charged with management fees, etc. are fixed, unchangeable and transparent for everyone when the fund is set up in a smart contract on the blockchain. This smart contract then issues fund shares – or more precisely: The smart contract creates (“mints”) blockchain tokens, which investors purchase in any small fractions directly via the fund’s smart contract or indirectly via decentralized exchanges (DEX) such as Uniswap or Sushiswap. These fund tokens have the same properties as all other blockchain tokens: They can be lent to other DeFi protocols for the purpose of yield framing (i.e., passive generation of returns), deposited as collaterals for loans (e.g., to build a leverage position), etc.
That may sound a bit abstract. Let’s take a look at the whole thing using the “Set Protocol” as an example: The Set Protocol is pretty much the de facto standard for decentralized fund management and is now available not only on Ethereum but also on the Polygon and Optimism. The Set Protocol is “only” about smart contracts, but not a graphical user interface. If you are a programmer, then this is not a problem for you, because you can integrate the Set Protocol functions into your programs via the usual interfaces. But if you’re not a programmer and, for example, just want to buy some fund shares in a few minutes, then you need another solution. For these users, the Set Protocol community has created the dApp (dApp = decentralized application) www.tokensets.com, which is based on the Set Protocol and with which you can invest in funds with a few clicks and just as easily launch your own fund. In the following I will show you these two user journeys in detail:
User journey 1: Buy a share of a fund
Step 1: Open www.tokensets.com in your browser and click on “Explore Sets” to start the search for the right fund for you.
Step 2: Now you see an overview of the most popular sets (in the Set Protocol community we don’t talk about funds but about sets). You can use search masks to search for other funds as you wish. Next, let’s select the DeFi Pulse Index set.
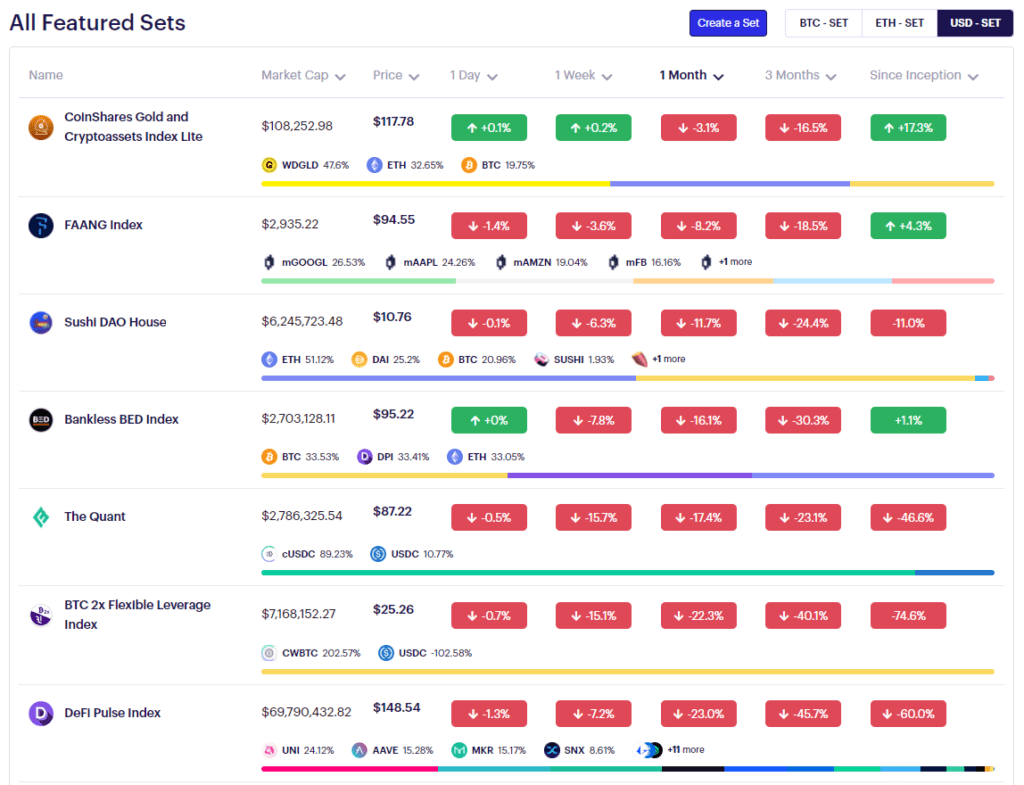
Step 3: Now you can see all the details, information, price developments, links to further information etc. about the DeFi Pulse Index set. This set is probably the most well-known DeFi fund: It is a passive, market capitalization-weighted fund, which is issued by the Index Coop community and aims to track the leading projects / protocols in the DeFi space. For a crypto investor who does not want to deal with the details of selecting individual stocks, this is probably not the worst choice…
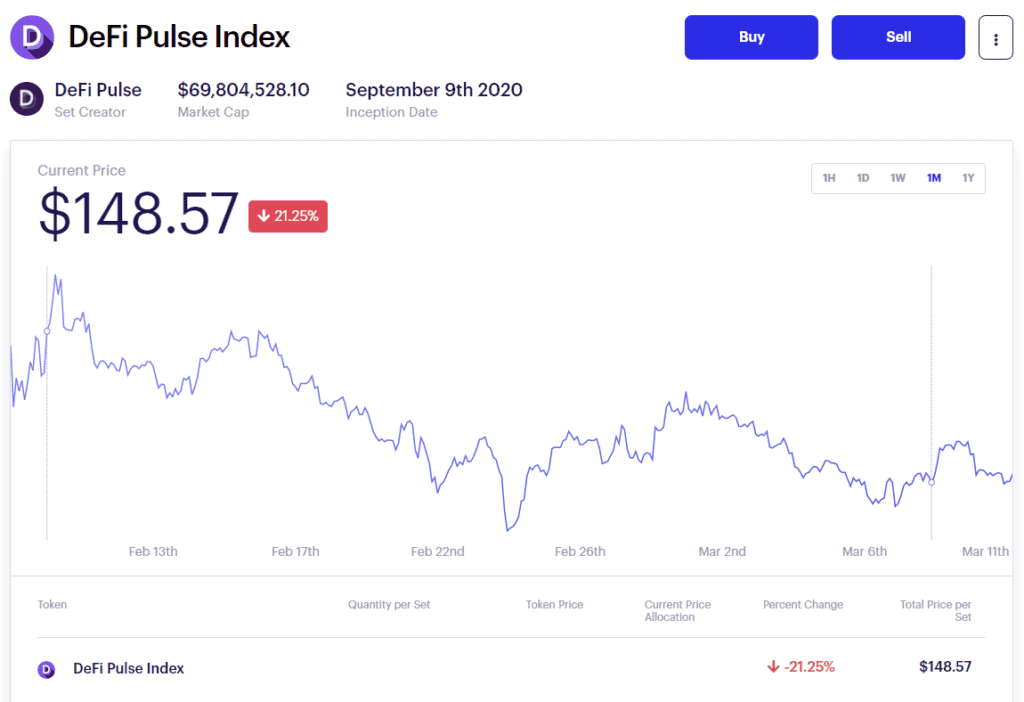
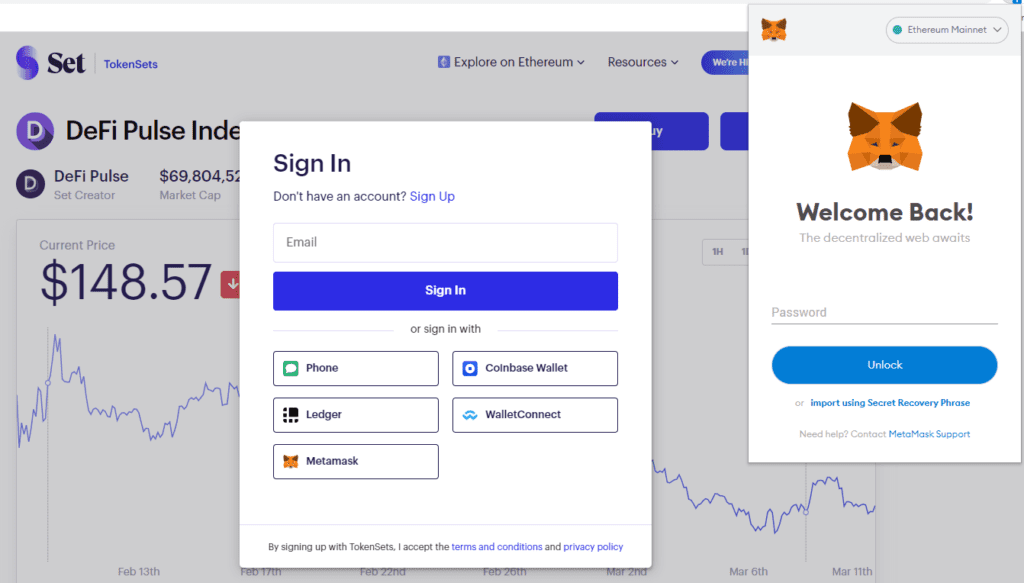
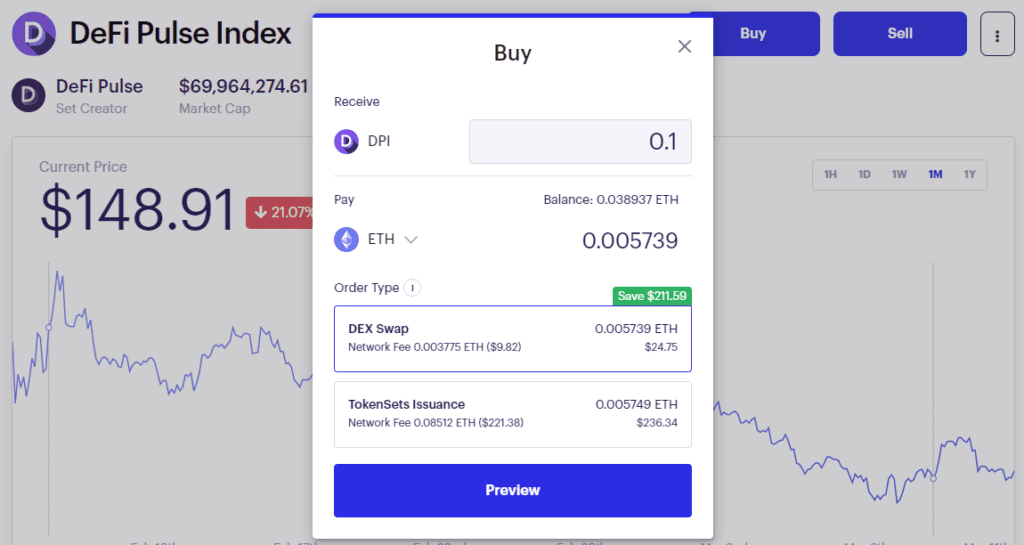
Step 4: Let’s say you now want to buy a share of this set. To do this, click on “Buy” and then connect to your crypto wallet (e.g., the software wallet MetaMask or the hardware wallet Ledger Nano X).
Step 5: Now enter the number of shares (or fractions of shares) you wish to purchase. You can specify which currency / tokens you want to pay with (ETH, USDC, WBTC etc.) and whether you want to “mint” (i.e., create) a new fund share, which is expensive because all positions contained in the fund are bought new or whether you want to buy an existing fund share via a decentralized exchange (in this case Uniswap), which is significantly cheaper.
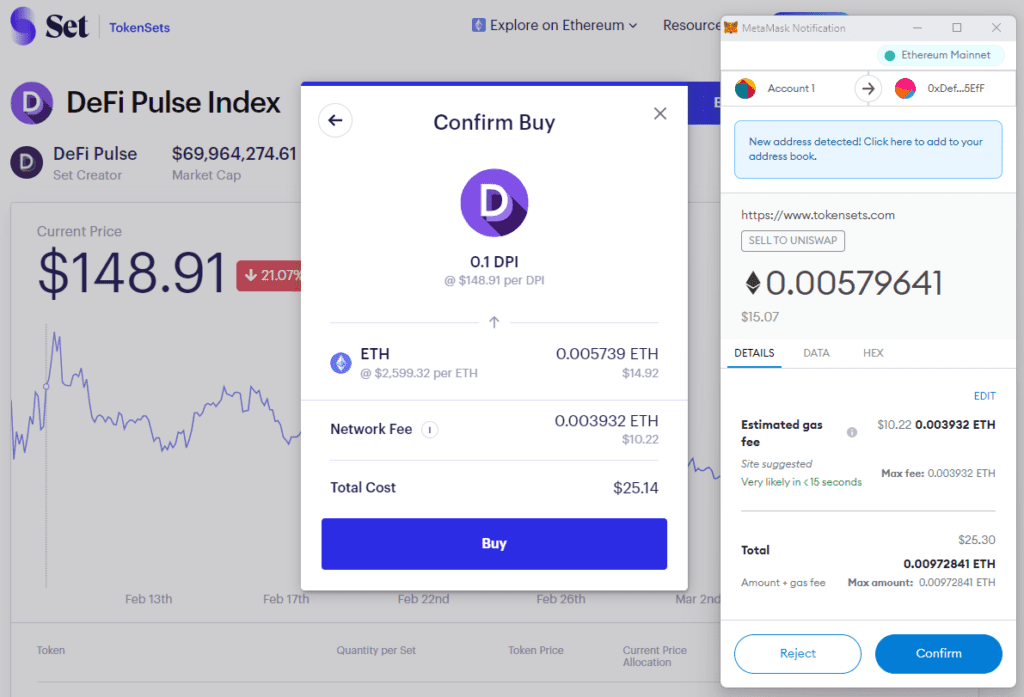
Step 6: In order to definitely buy the fund share, you must finally sign the transaction with your wallet (i.e., with your private key, which is managed by the wallet), which then immortalizes the transaction on the blockchain and you become the irrevocable owner of the purchased share.
User journey 2: Launch your own fund
Step 1: Open www.tokensets.com in your browser and click on “Create a Set” to start the guided process of creating a new set/fund.
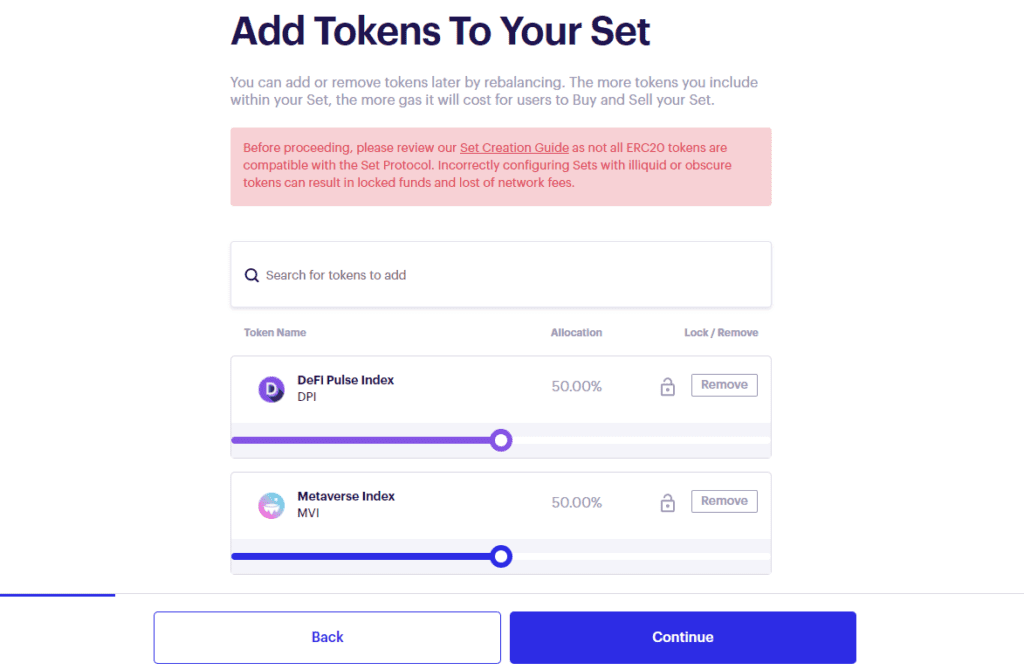
Step 2: First you define which tokens should be managed in your fund. In our example, I chose the DeFi Pulse Index (DPI) and the Metaverse Index (MVI) at 50% each (the percentage can later be adjusted manually by the fund manager or automatically via smart contracts).
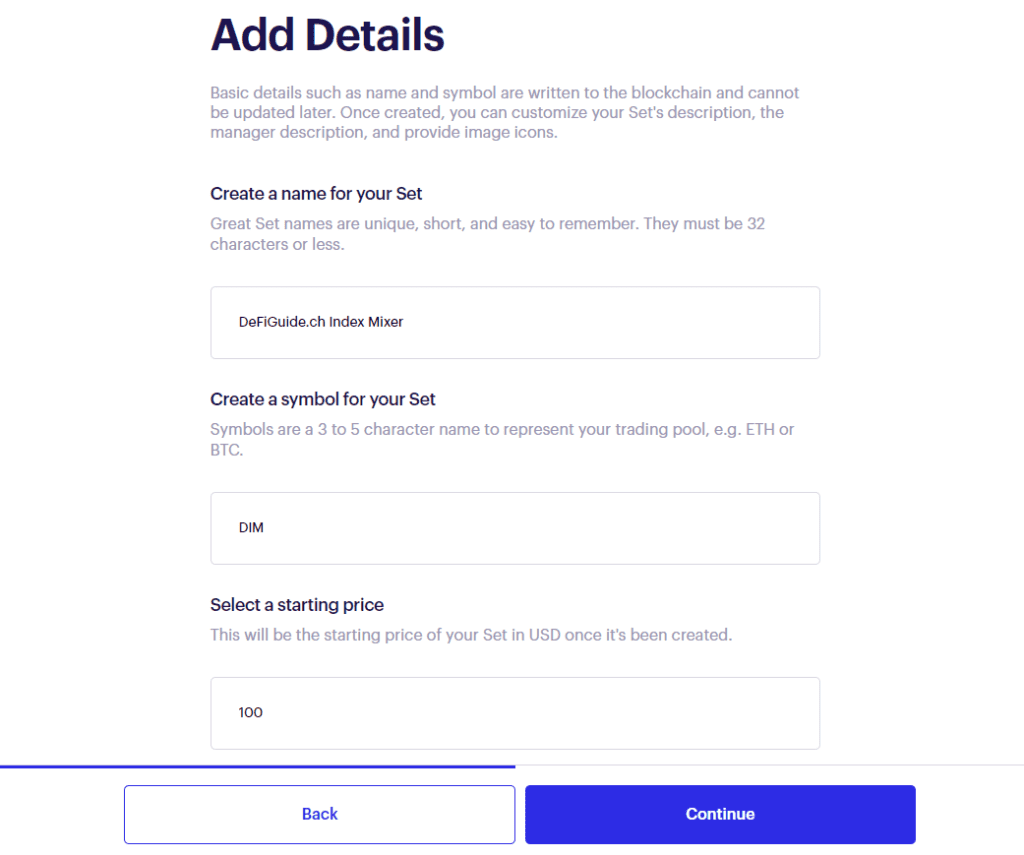
Step 3: Next you define the name, ticker / symbol and starting price for your fund tokens.
Step 4: In the next step you will see a summary of your new fund and if everything is OK you can now publish the fund to the blockchain (you will be prompted sign this transaction with your wallet) and your new fund can be traded by anyone. After you have launched the fund, as a new fund manager you have access to a few management modules with which you can control the rebalancing, the management fees (here called “streeming fees”), etc.
So, that’s all I have to say about the Set Protocol. I wish you happy fund launching!