A lot of time has passed since the legendary launch of CryptoKitty NFT (Non-Fungible Tokens) in 2017. In the meantime creating, collecting and trading NFT has become pretty much mainstream. The user experience has changed accordingly, so that today you no longer have to write smart contracts and upload images to peer-to-peer networks yourself to create your own NFT. Instead, today there are dApps like OpenSea, with which you can convert your artworks into NFT with a few clicks and offer them for sale. In this article I will give you an overview of OpenSea and show you how you can easily and free of charge transform your artworks into NFT.
What is OpenSea?
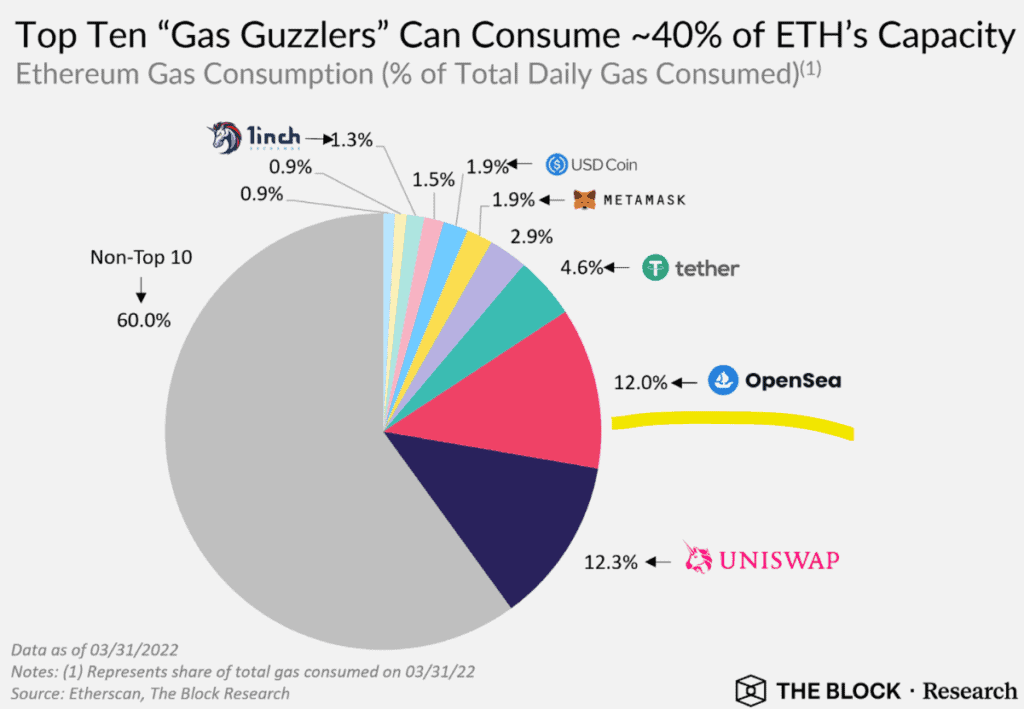
OpenSea is a dApp (decentralized application) billed as “the world’s first and largest NFT marketplace”. If we take a quick look at the following infographic from THE BLOCK Research (based on data from Etherscan from March 31, 2022), then we see that this is probably not exaggerated: According to Etherscan, OpenSea is an absolute giant on Ethereum eating up 12.0% of the total computing power of Ethereum.
Facts and figures about OpenSea
Here the key figures about OpenSea:

- User journeys: On OpenSea, you can pretty much do anything with NFT that you would expect from a leading NFT marketplace: You can create, sell, and buy NFT and you can create and share your NFT collections. Let me quickly present to you a couple of facts on OpenSea:
- Create free NFT: You can create NTF on OpenSea for free. You only pay fees when you sell your NFT. This means that you can simply experiment with different NFT and check wheter you are able to sell them without needing any upfront investments. Small note on this: Before you create an NFT for the very first time, you have to pay a small amount in the form of gas fees to initialize your account with OpenSea.
- Supported blockchains: OpenSea started on Ethereum in 2017 and in the meanwhile also supports NFT on Polygon, Klaytn and Solana. Accordingly, users can benefit from the lower transaction fees of alternative chains (i.e., not Ethereum).
- Non-fungible and semi-fungible tokens: In addition to the classic non-fungible token standards (ERC-721 for EVM-compatible chains and KIP17 for Klatyn), OpenSea also supports semi-fungible token standards (ERC-1155 for EVM-compatible chains and KIP37 for Klatyn). With the classic non-fungible tokens, each token is unique and differs from other tokens. Semi-Fungible Tokens are a bit different: Semi-Fungible Tokens are also different from each other, but there is more than one token of each.
- Creator earnings: A cool aspect of NFT is that they can be programmed in such a way that the artist (or the creator of the NFT) earns a share of any future hand changes of the NFT. You can set up your NFT in such a way that you participate in the future increase in value, for example by earning 5% of the sales price every time one of your NFT is sold.
- Auctions: On OpenSea you can choose between many different types of sales; including auctions. For example, you can sell your NFT to the highest bidder in an auction (“English Auction”) or you can set up an auction with a continuously decreasing price (“Dutch Auction”).
- Who pays the gas fees when selling an NFT? The following rules apply to OpenSea: With fixed prices, the buyer pays the gas fees. The seller pays them when he accepts a bid. And OpenSea pays the gas fees to the highest bidder at an auction.
- Accepted media types: On OpenSea you can use images, video, audio and 3D models to create NFT.
User journey: Create your own NFT
So, enough theory about OpenSea. Now let’s take a step-by-step look at the user journey of creating an NFT.
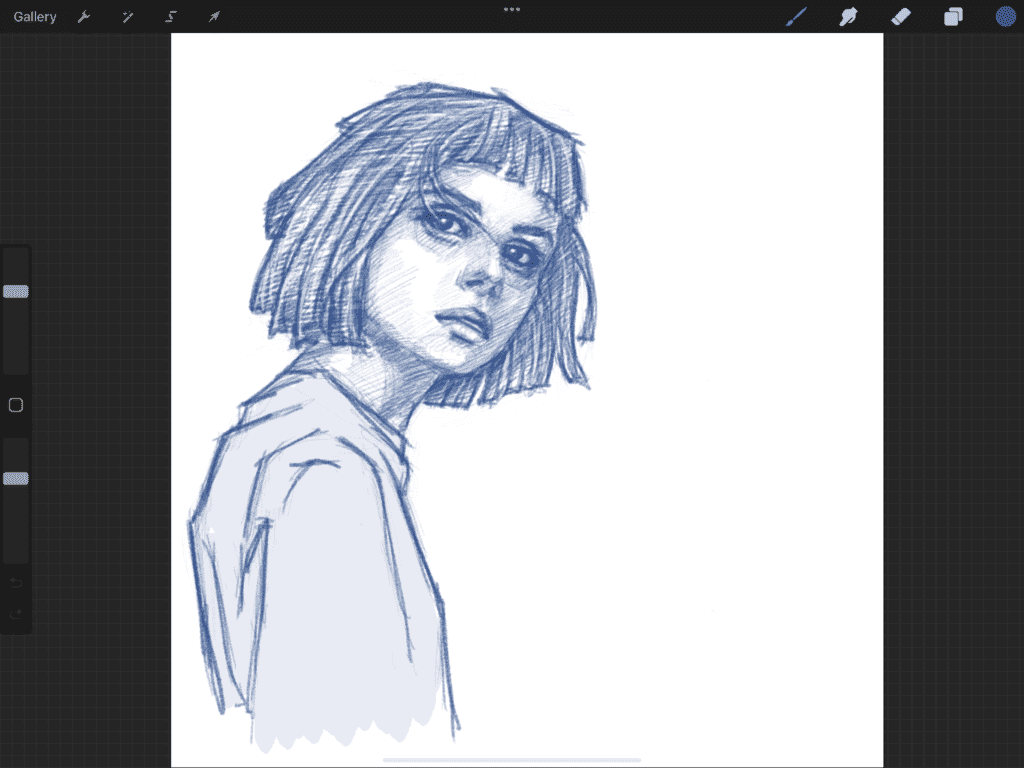
Step 1: First you create your own digital artwork, which you then want to turn into an NFT. There are endless creative possibilities here and everyone has their own way of creating digital art. For example, I personally love sketching portraits with the Apple Pencil on my iPad. For this I use the Procreate app. (Note: On Instagram you can find under the handle felix.hauser.ch different portrait sketches that I have created in this way). In our example, let’s assume that we want to convert the following sketch from Procreate into an NFT and we have saved this sketch as a JPEG.
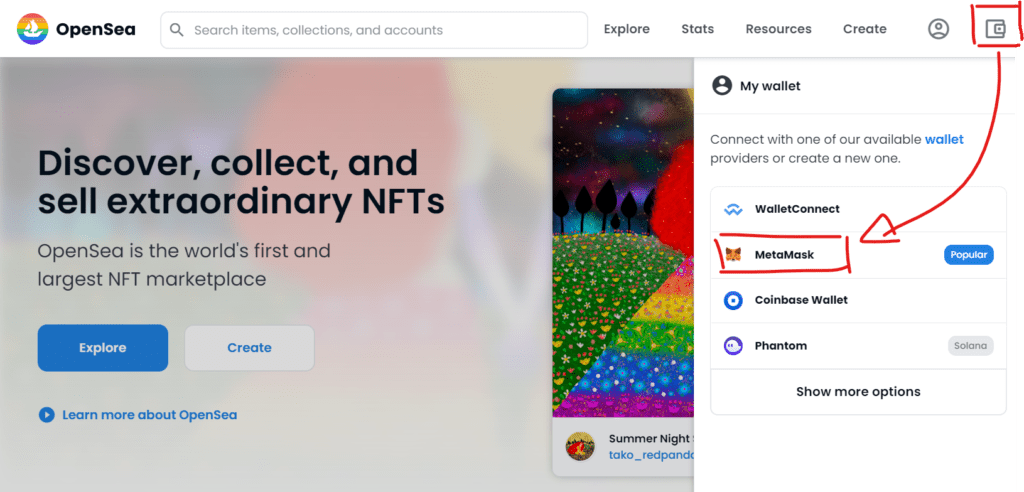
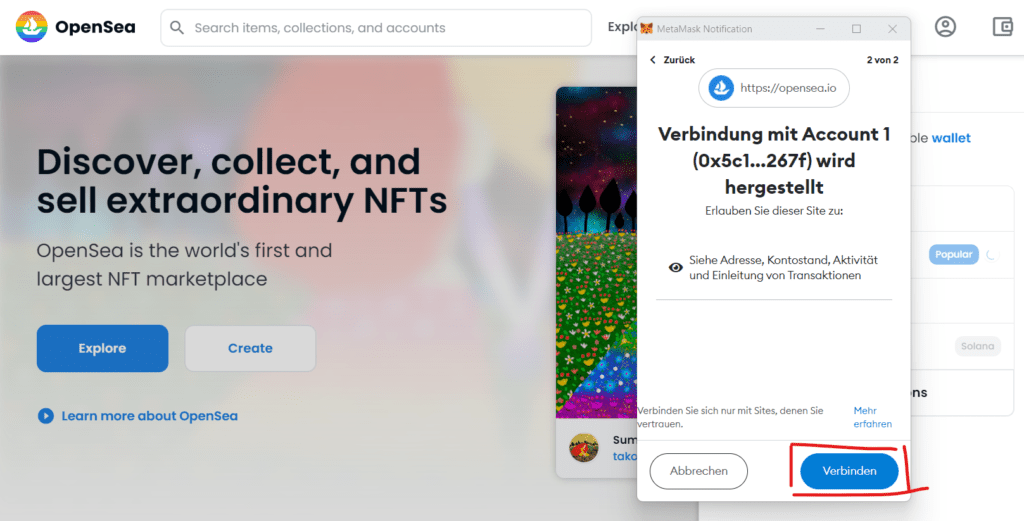
Step 2: open now opensea.io in your browser and click the wallet icon to connect your wallet with OpenSea. You see, we are here in web 3! Here, nobody creates an account with a username and password. As with all dApps, you identify yourself exclusively via your wallet (or via your key, which is saved in your wallet). As usual, I choose my MetaMask wallet to connect.
Step 3: Now allow OpenSea to connect with your wallet.
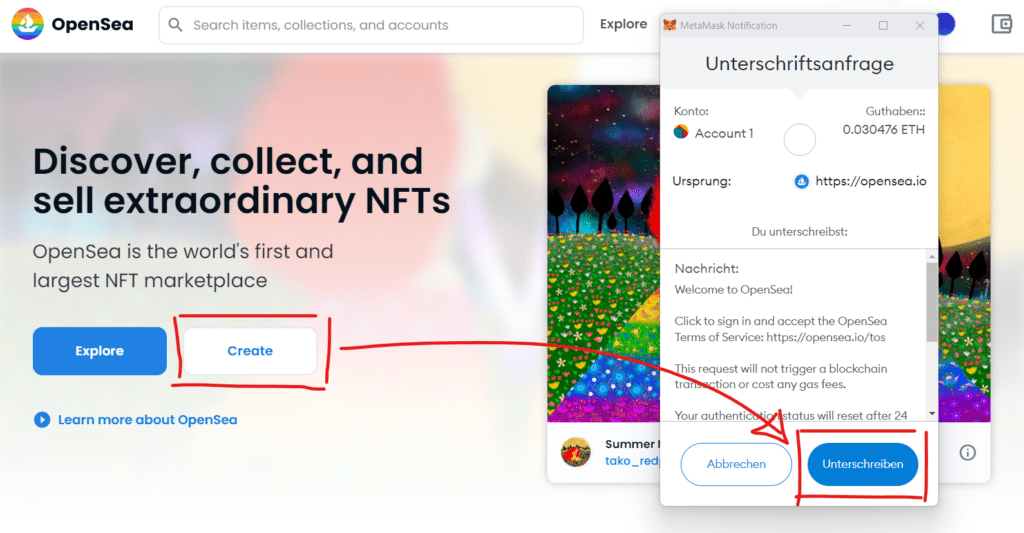
Step 4: Next, start creating your NFT by clicking Create. First you will be prompted to accept the OpenSea terms of services with your wallet. But don’t worry, there are no gas fees because this does not trigger a blockchain transaction.
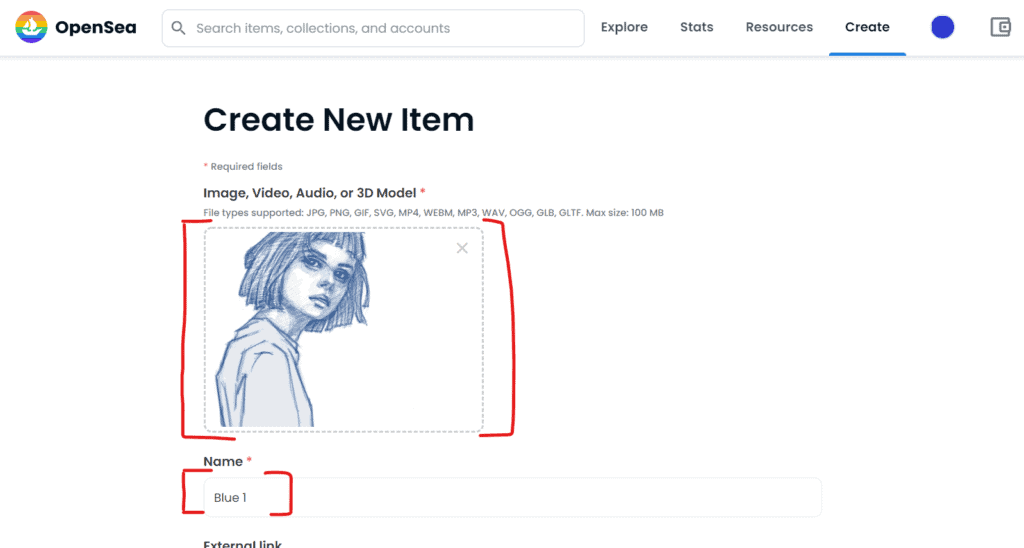
Step 5: The form for specifying our new NFT will now open. First we upload our JPEG with the portrait and name the NFT ‘Blue 1’. Next, we can define a plethora of textual and numeric NFT attributes, which I won’t go into detail here.
Step 6: Finally, at the end of the form, we specify that only one instance of the NFT should exist (Supplies = 1) and that we want to launch the NFT on Polygon, which will allow us to significantly reduce gas fees for everyone involved compared to Ethereum.

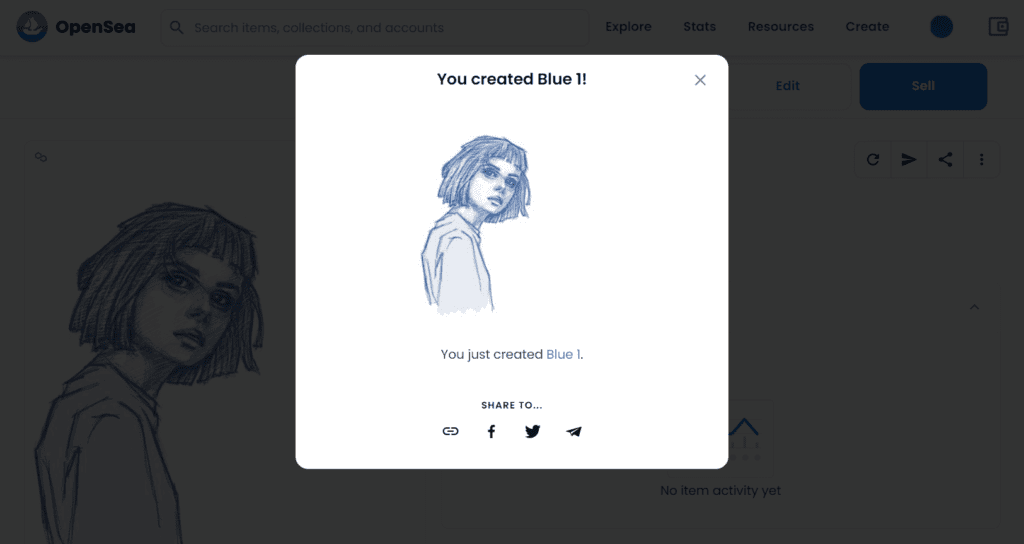
Step 7: Now we just have to click Create and our new NFT is created!
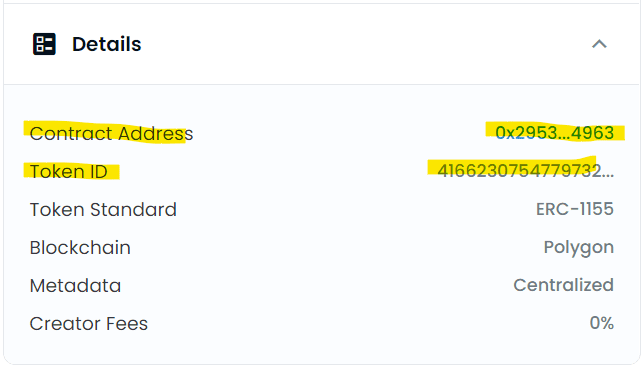
Step 8: But has the NFT really been created on the Polygon blockchain? Anyone can say that! How can we verify this? For this we look at the details of our created NFT on OpenSea. As you can see in the screenshot below, there we find the contract address of the NFT smart contract and the token ID of our created token.
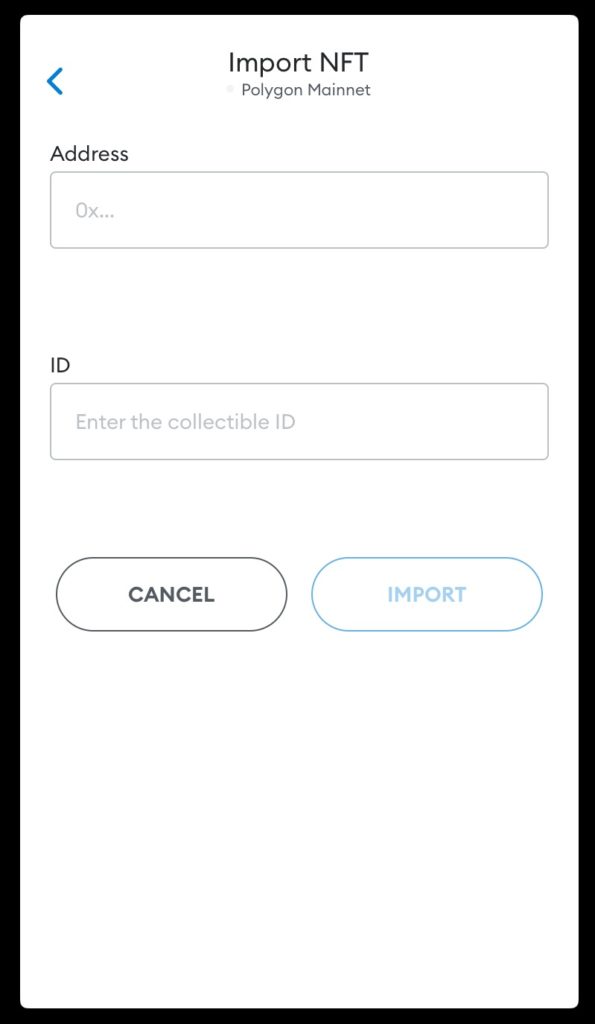
Step 9: Next we open another device; e.g., a smartphone. We open the MetaMask app on the smartphone and click Import NFT to paste the contract dddress and token ID from step 8 into the form that opens.
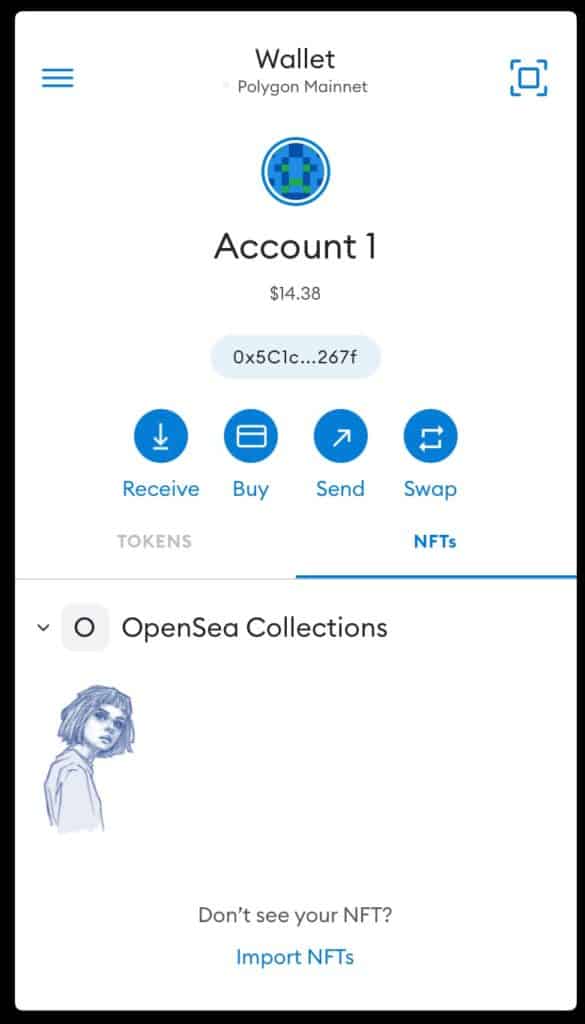
Step 10: Et voilà! Based on the smart contract address and the NFT ID, MetaMask finds our newly created NFT on the Polygon blockchain.
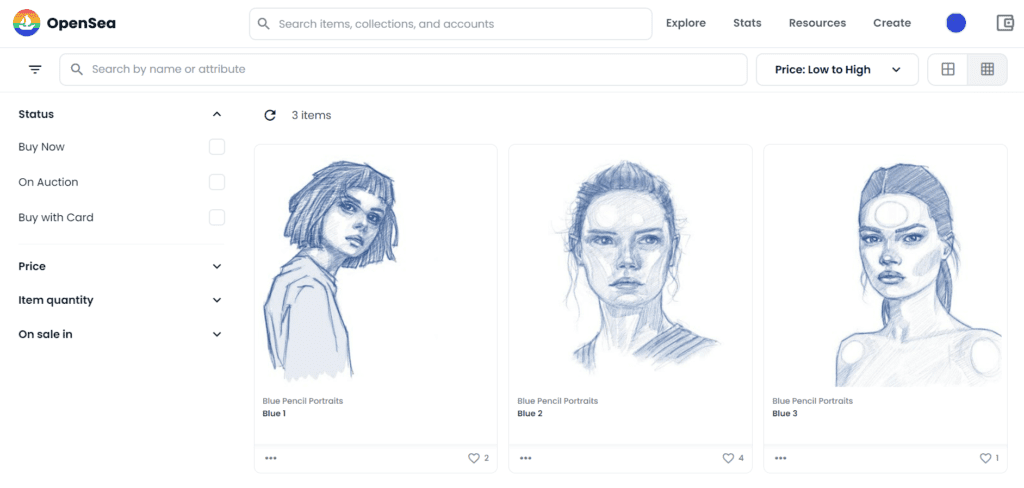
Step 11: Now we can repeat the steps for creating an NFT via OpenSea a few times and create our own little NFT art collection of NFT. Here the link to the collection we created in this example.
So… I hope the example was fun and inspired you to convert some of your own creations into NFT yourself.